
")
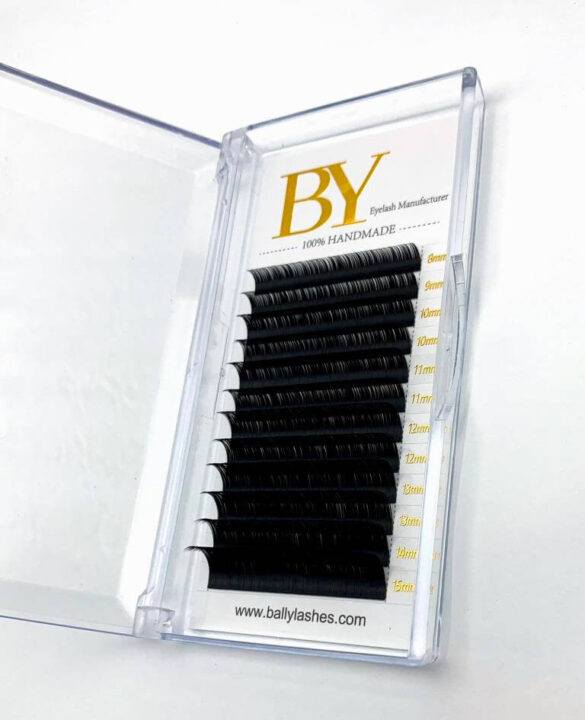
Eyelash Extensions Specifications:
- False eyelashes sort:Eyelashes extension
- False eyelashe length:8mm-15mm
- False eyelashe type:Individual lashes
- Size:12 rows / tray
- Manufacturing process: 100% Hand made
- Item type:False eyelash
- Color:Black individual lash
- Feature1:Soft ,natural
- Feature2:Traditional lashes
- Curl:Cc
- Thickness:0.10mm
- Length:8,9,10,11,12,13,14,15mm

Eyelash extensions add volume to the natural lash line and can lift the face and make people appear more youthful. It’s no secret societal beauty standards applaud long, thick eyelashes, and with extensions, you can enhance your natural beauty without the use of makeup or other beauty products,
EyeLash Extensions are single strands of synthetic eyelashes that are curved to replicate a natural eyelash. They are applied to each individual natural eyelash one by one for a natural, beautiful and luscious look. Eyelash Extensions are perfect for special occasions or for day to day wear.
If applied correctly and adequately, it will not damage or harm natural lashes. Extensions should be carefully chosen (length and thickness) and used to one natural lash at a time to avoid breaking the lashes,
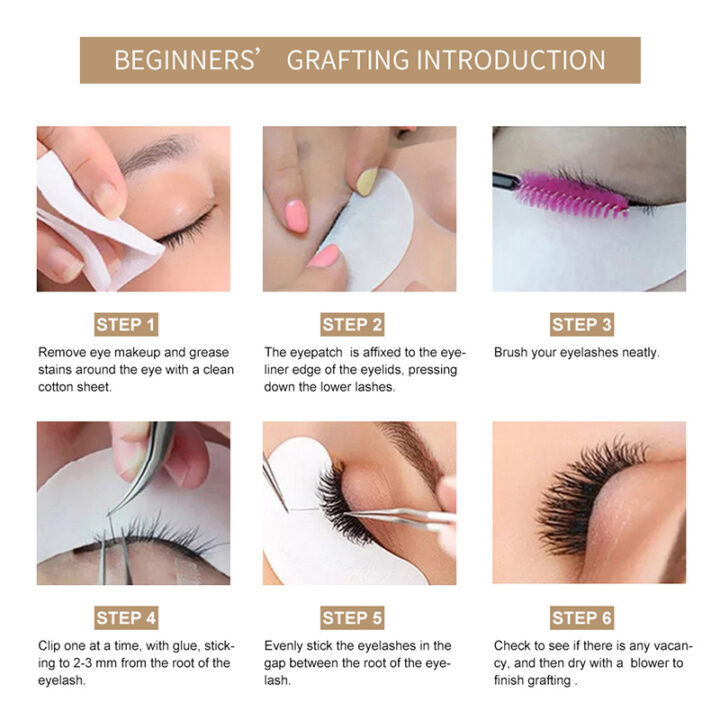
Application Method:
- STEP: wasah and Clean the eyelashes Properly.
- STEP: Apply primer to lashes,Primer is a pre-treatment for eyelash extensions to better retention. It improves the attachment of lash extensions to natural lashes.
- STEP: Apply Patches under eye properly. Keep an eye on your lash extension isolation tweezers, In most cases, their tips should not contact the eye pad. Check the eye pads. It’s always better to detect 2 or 3 lower lashes sticking out or even glued together at an early process.
- STEP: Map out your eyelash saves you time by allowing you to create the perfect variety of lash extensions in less time and go back to your lash mapping at any time. Eyelash mapping is essential for offering excellent lash extensions to your clients, no matter how long you’ve been lashing.
- STEP: Isolating with both tweezers, angle your isolation tweezer downwards towards the lashes. To provide a clean view range and make isolation simpler, slant your pick-up tweezer up, lifting and moving the lashes away.
- STEP: Slowly Dip the extension into the glue, striking the exact balance between too much and too little glue. To avoid retention concerns, make sure you use the appropriate quantity.
- STEP: Properly isolate and apply the eyelash extensions to natural lash,
- STEP: Place the eyelash extension onto the natural lash after swiping it with just enough adhesive to coat it on the natural lash around 1 mm from the eyelid.
- STEP:No multiple lash extensions or natural lashes should be sticking to each other. Using eyelash tweezer separate the stucked lashes carefully,
- STEP: After appling all the lashes let it dry for 3 to 4 mints ,

Reviews
There are no reviews yet.